
Thank You
Request for call back
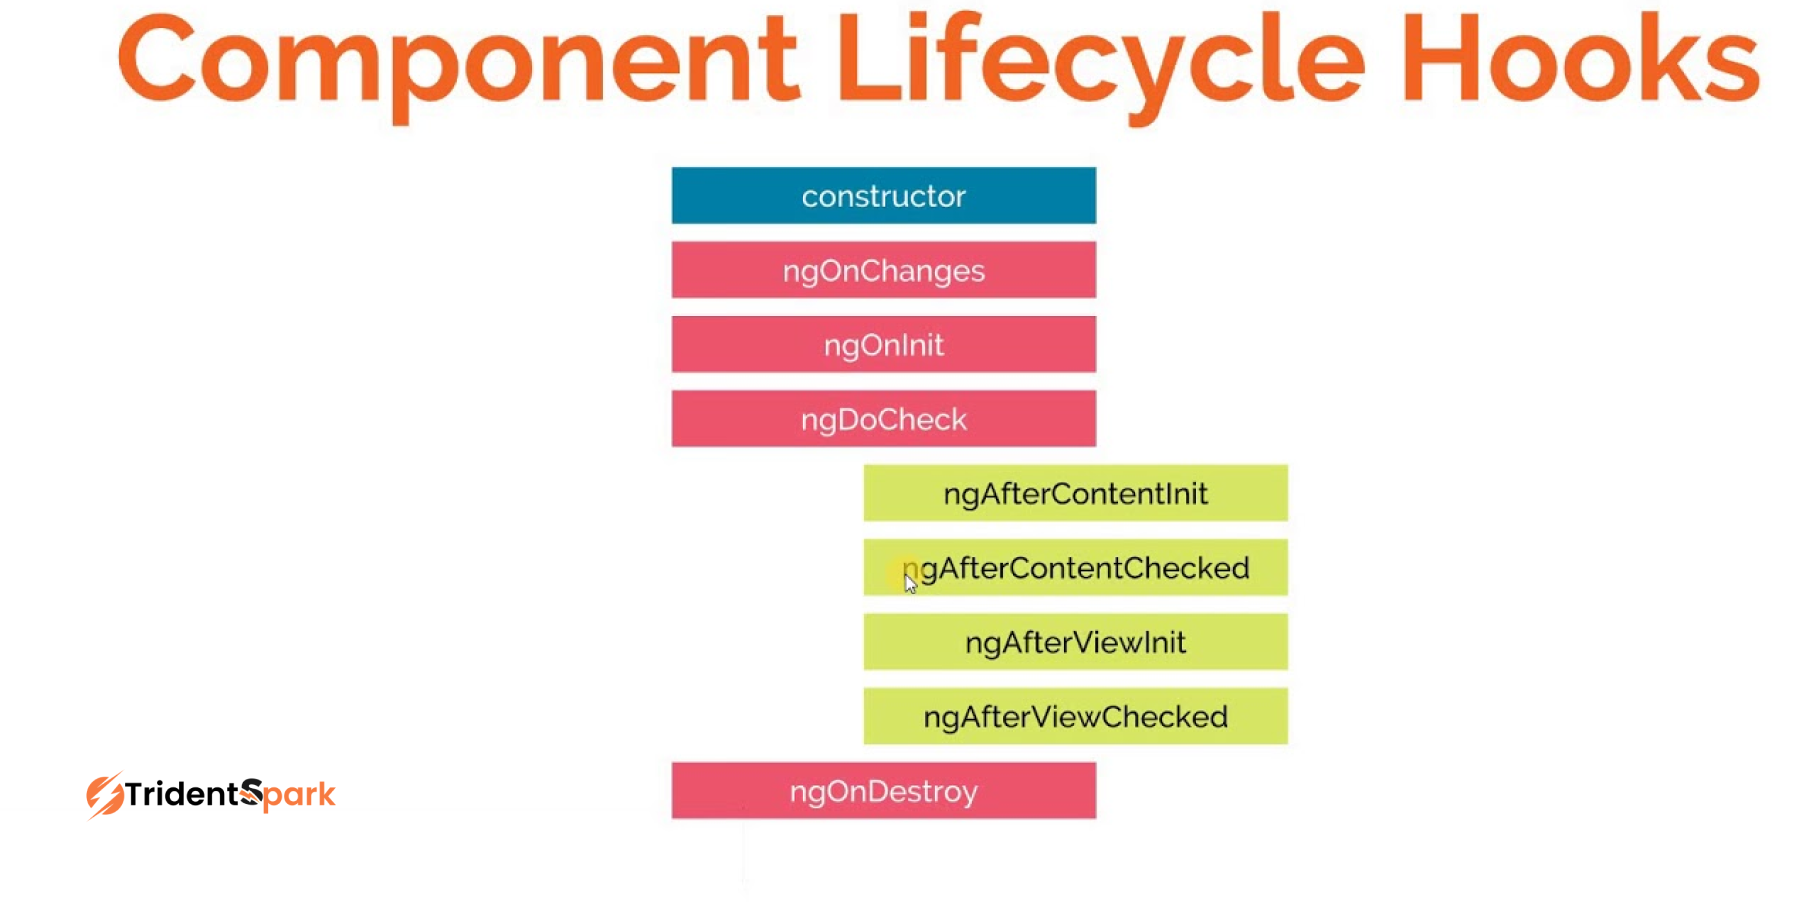
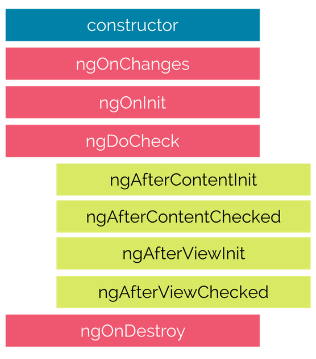
Life Cycle Hooks in angular
The life of component in angular and its various stages.
With Angular, you can build web applications dynamically and flexibly. The life cycle hooks are at the heart of the system, enabling developers to orchestrate the behavior of components throughout the lifecycle of each component. Angular hooks provide insight into how components are created, updated, and destroyed, allowing developers to control the application’s behavior precisely.
In this detailed guide, we examine the life cycle hooks in Angular. This article aims to discuss each of the available hooks, examine their significance, and explain their practical applications in the development of robust web applications.
Difference between Software life cycle and angular component lifecycle.
Life cycle of a software and the life cycle of a component in Angular are two different things. The differences are as vast as the life of a star and life of a cockroach.
How can we use this ?
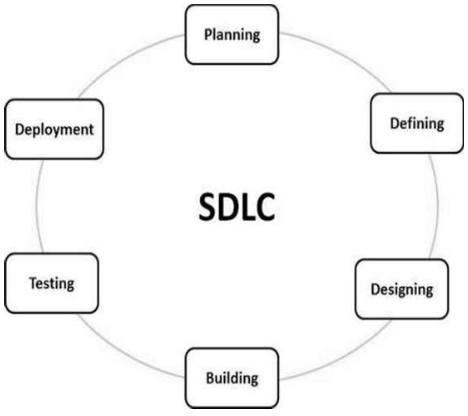
Life cycle of a software
The browser based TypeScript compiler doesn’t trigger a compilation error when we don’t implement interface functions so we actually can’t see the benefit of this in the browser, but doing this using the offline local compiler will throw an error.
Crucial stages of Life Cycle Hooks
The Angular framework provides life cycle hooks to allow developers to access various stages of the component’s life cycle. There are four main phases to these stages:
Creation
It is during this phase that a component is created. During initialization, properties are set, dependencies are injected, and the component is prepared for rendering.
Updating
This phase involves checking Angular’s input properties for changes and re-rendering the component as necessary.
Destruction
The destruction phase begins when a component no longer serves its purpose. Cleaning up resources and performing any necessary cleanup operations can be done in this area.
Check
The Updating phase follows the Destruction phase. Checking for updates and updating the view as necessary is part of the process. Several predefined life cycle hooks provided by Angular can be incorporated into your components to perform specific tasks during specific phases.
Why Do We Initialise Components in ngOnInIt ?

Why to use ngOnInIt but not constructor ?
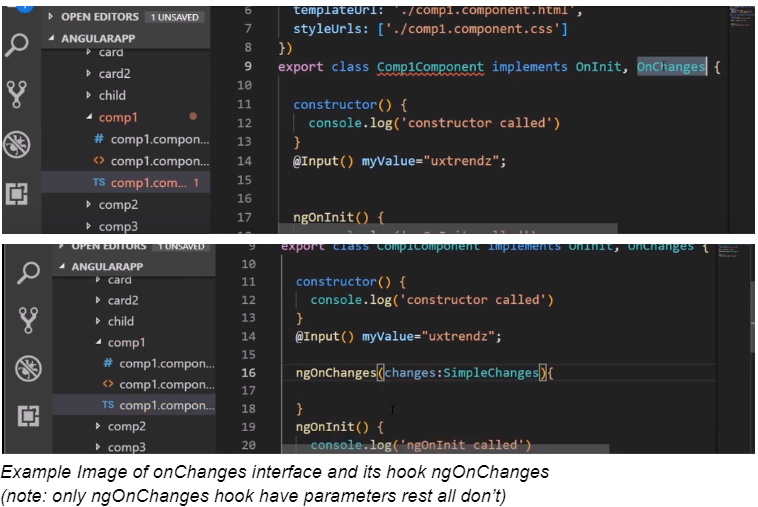
Because the constructor should only be used to initialise class members but shouldn’t do actual “work”. So you should use constructor() to set up Dependency Injection and not much else. ngOnInit() is a better place to “start” – it’s where/when components’ bindings are resolved.In the constructor we don’t yet have access to the input properties. The reason we use ngOnInit and not ngOnChanges to initialise a component is that ngOnInit is only called once whereas ngOnChanges is called for every change to the input properties.
Hooks for component, child component and for directives.
Although all the hooks which we mention above can be used with the component, there are hooks which can be used with directives or with the child components only.
There are fours hook which works for component’s childrens
ngAfterContentInit,
ngAfterContentChecked,
ngAfterViewInit
ngAfterViewChecked
How to Use Life Cycle Hooks
Angular components can be configured with life cycle hooks by implementing the corresponding methods. To illustrate some of the common life cycle hooks, here’s an example:
import { Component, OnInit, OnDestroy, OnChanges, SimpleChanges } from '@angular/core';
@Component({
selector: 'app-example',
template: `Example Component
`,
})
export class ExampleComponent implements OnInit, OnDestroy, OnChanges {
constructor() {
console.log('Constructor called');
}
ngOnChanges(changes: SimpleChanges): void {
console.log('ngOnChanges called', changes);
}
ngOnInit(): void {
console.log('ngOnInit called');
}
ngOnDestroy(): void {
console.log('ngOnDestroy called');
}
}
Must know aspects of Pitfalls and Best Practices in life cycle hooks.
Must know aspects of Pitfalls and Best Practices in life cycle hooks.
Keep logic to a minimum.
Methods for life cycle hooks should remain concise and purpose-driven. Tasks and computations requiring heavy computations should be delegated to services.
Opt out from observational data.
Keep your component from leaking memory by unsubscribing from observables in the ngOnDestroy hook.
Keep performance in mind.
A ngDoCheck hook with custom change detection logic could negatively impact performance. Take care when using it, and consider alternatives such as ChangeDetectionStrategy.
Keep state changes to a minimum.
Generally, you shouldn’t modify component properties in hooks like ngOnChanges because it may result in unexpected behavior. Observe, not change, the state of the system with these hooks.
Be aware of the order.
A life cycle hook’s order of call is crucial to understanding. To place your logic correctly, you need to understand when each hook is triggered.
Conclusion
With Angular, life cycle hooks provide developers with a fundamental way to control component behavior at specific points in their life cycle. Using these hooks, you can do everything from initializing and detecting changes to cleaning up resources and manipulating DOM elements. To create maintainable and performant Angular applications, you should use them carefully and follow best practices. The life cycle hooks in Angular will help you develop interactive and robust web applications.
Recent Added Blog
Life Cycle Hooks in angular